Overview
The LLM Agent is the central component of Evo AI, acting as the “thinking” part of your application. It leverages the power of a Large Language Model (LLM) for reasoning, natural language understanding, decision making, response generation, and interaction with tools. Unlike deterministic workflow agents that follow predefined execution paths, theLLM Agent behavior is non-deterministic. It uses the LLM to interpret instructions and context, dynamically deciding how to proceed, which tools to use (if any), or whether to transfer control to another agent.
Key Features
Dynamic Reasoning
Tool Usage
Multi-turn
Flexibility
Creating Your First LLM Agent
Step-by-Step Platform Guide
Let’s create a complete LLM agent using the Evo AI interface:1. Start agent creation
1. Start agent creation
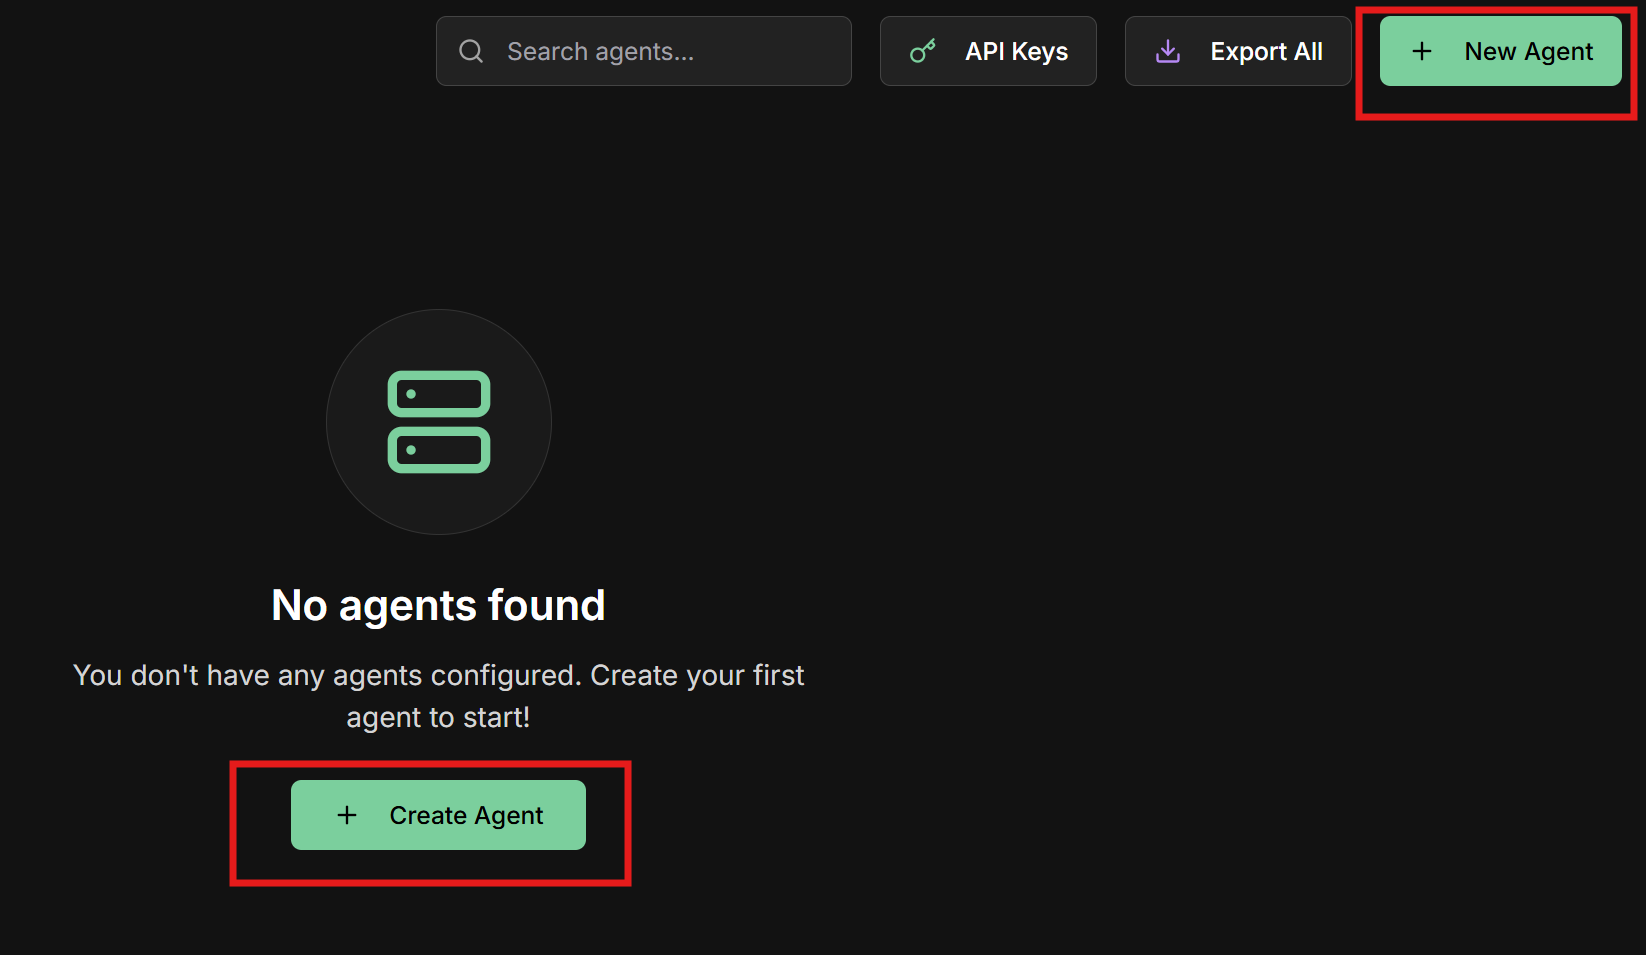
- On the Evo AI main screen, click “New Agent”
- You will be directed to the creation form
2. Configure basic information
2. Configure basic information
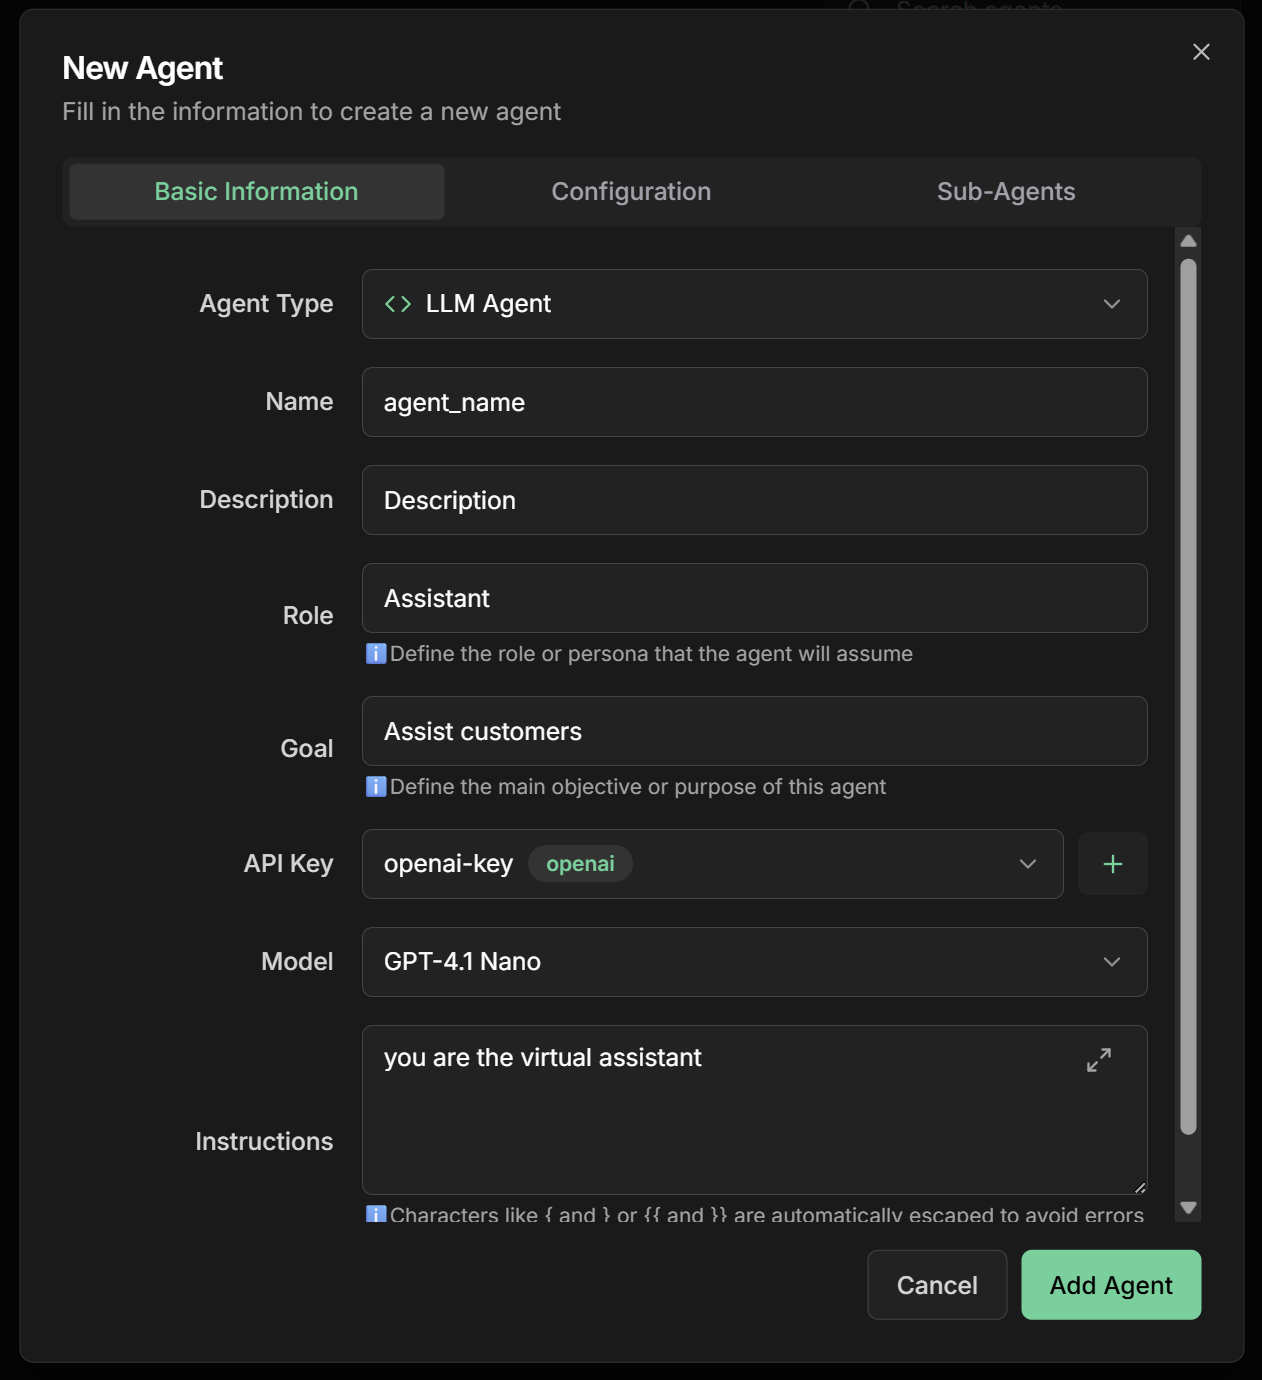
3. Select model and API Key
3. Select model and API Key
| Model | Characteristics | Best for |
|---|---|---|
| GPT-4 | Advanced reasoning, creative | Complex tasks, analysis |
| GPT-3.5-turbo | Fast, economical | General conversations, support |
| Claude-3-Sonnet | Balanced, safe | Document analysis |
| Gemini-Pro | Multimodal, fast | Image processing |
| Llama2-70b | Open source, customizable | Specific cases |
4. Define detailed instructions
4. Define detailed instructions
5. Configure Agent Settings
5. Configure Agent Settings
Agent Settings Section - Configure advanced functionalities:For our sales assistant, we recommend:✅ Load Memory:- Enable to remember customer preferences
- Allows personalization over time
- Improves experience for returning customers
- Not recommended initially (high token cost)
- Consider only for VIP customers with long history
- Enable for structured sales processes
- Helps divide complex tasks (analysis + recommendation + closing)
- Improves service organization
- Enable for access to product catalog
- Configure tags:
products,technology,prices - Allows updated responses about specifications
- Configure to capture structured customer data:
6. Save and activate
6. Save and activate
- Review all settings carefully
- Click “Save” or “Create Agent”
- Wait for creation confirmation
- Your agent will be available in the agents list
- Status should appear as “Active”
Multi-Agent Systems (Sub-Agents)
Fundamental Concepts
Based on the Google Agent Development Kit, multi-agent systems allow creating complex applications through composition of multiple specialized agents.transfer_to_agent tool is automatically made available. This function allows the main agent to delegate session execution to one of its specialized sub-agents, transferring complete control of the conversation.Agent Hierarchy
Workflow Agents
Communication
Specialization
Configuring Sub-Agents on the Platform
1. Agent Hierarchy (Parent-Child)
1. Agent Hierarchy (Parent-Child)
- Create specialized agents first:
- Greeting agent
- Qualification agent
- Demonstration agent
- Closing agent
- Configure the coordinator agent:
- In the main agent form
- “Sub-Agents” section
- Select previously created agents
- Define priority order
- Define coordination instructions:
- Each agent can have only one parent
- Configure clear hierarchy of responsibilities
- Use descriptive names to facilitate references
2. Practical Example: Sales Team
2. Practical Example: Sales Team
- Name:
lead_qualifier - Description:
Qualifies leads and identifies budget and needs - Instructions:
- Name:
product_demo - Description:
Demonstrates products and explains technical benefits - Instructions:
- Name:
closer - Description:
Specialist in closing and negotiation - Instructions:
- Name:
sales_team_coordinator - Sub-Agents:
lead_qualifier,product_demo,closer - Instructions:
Communication Mechanisms
transfer_to_agent Function
transfer_to_agent Function
- Automatically available when sub-agents are configured
- Allows transferring complete session control to a specific sub-agent
- The sub-agent takes over the conversation and can interact directly with the user
- Context and history are maintained during transfer
- Configure Sub-Agents in the coordinator agent
- Use in Instructions clear guidance on when to transfer
- Identify by name the destination sub-agent
- Complete specialization by area
- Reduces instruction complexity
- Improves quality of specialized responses
- Facilitates maintenance and updates
Shared State
Shared State
Intelligent Delegation
Intelligent Delegation
- Coordinator agent analyzes request
- Automatically decides which specialist to activate
- Transfers complete context to chosen agent
- Sub-Agents: Configure available specialists
- Instructions: Define routing criteria
- Descriptions: Describe each specialist well
Agents as Tools
Agents as Tools
- One agent can use another agent as a tool
- Allows even greater specialization
- Maintains well-defined responsibilities
- Tools: Add other agents as tools
- Instructions: Explain when to use each agent-tool
- Permissions: Configure access between agents
- Sales agent uses “price calculator” (another agent)
- Support agent uses “technical consultant” (specialist)
- Main agent uses “data validator” (checker)
Common Multi-Agent Patterns
1. Coordinator/Dispatcher Pattern
Platform Configuration
Platform Configuration
- Financial Agent: Billing and collection questions
- Technical Agent: Technical support and configurations
- Commercial Agent: Sales and products
- Name:
customer_service_dispatcher - Sub-Agents: Add all specialists
- Instructions:
- Automatic intelligent routing
- Specialization by area
- Easy scalability
2. Sequential Pipeline Pattern
Platform Configuration
Platform Configuration
- Name:
data_enricher - Instructions: “Enrich lead data with public information”
- Output Key:
enriched_data
- Name:
lead_scorer - Instructions: “Analyze request:
{{user_input}}and calculate score based on:{{enriched_data}}” - Output Key:
lead_score
- Name:
lead_classifier - Instructions: “Classify as HOT/WARM/COLD based on:
{{lead_score}}” - Output Key:
lead_classification
- Name:
lead_router - Instructions: “Direct to appropriate salesperson:
{{lead_classification}}” - Output Key:
assignment_result
- Type: Sequential Agent
- Sub-Agents: In stage order
- Instructions: Criteria for passing between stages
3. Generator-Critic Pattern
Platform Configuration
Platform Configuration
- Name:
content_generator - Instructions:
- Output Key:
generated_content
- Name:
content_critic - Instructions:
- Output Key:
feedback
- Name:
content_refiner - Instructions:
- Output Key:
refined_content
- Type: Loop Agent
- Max Iterations: 3
- Sub-Agents: Generator → Critic → Refiner
- Stop Condition: Score > 8 or maximum iterations
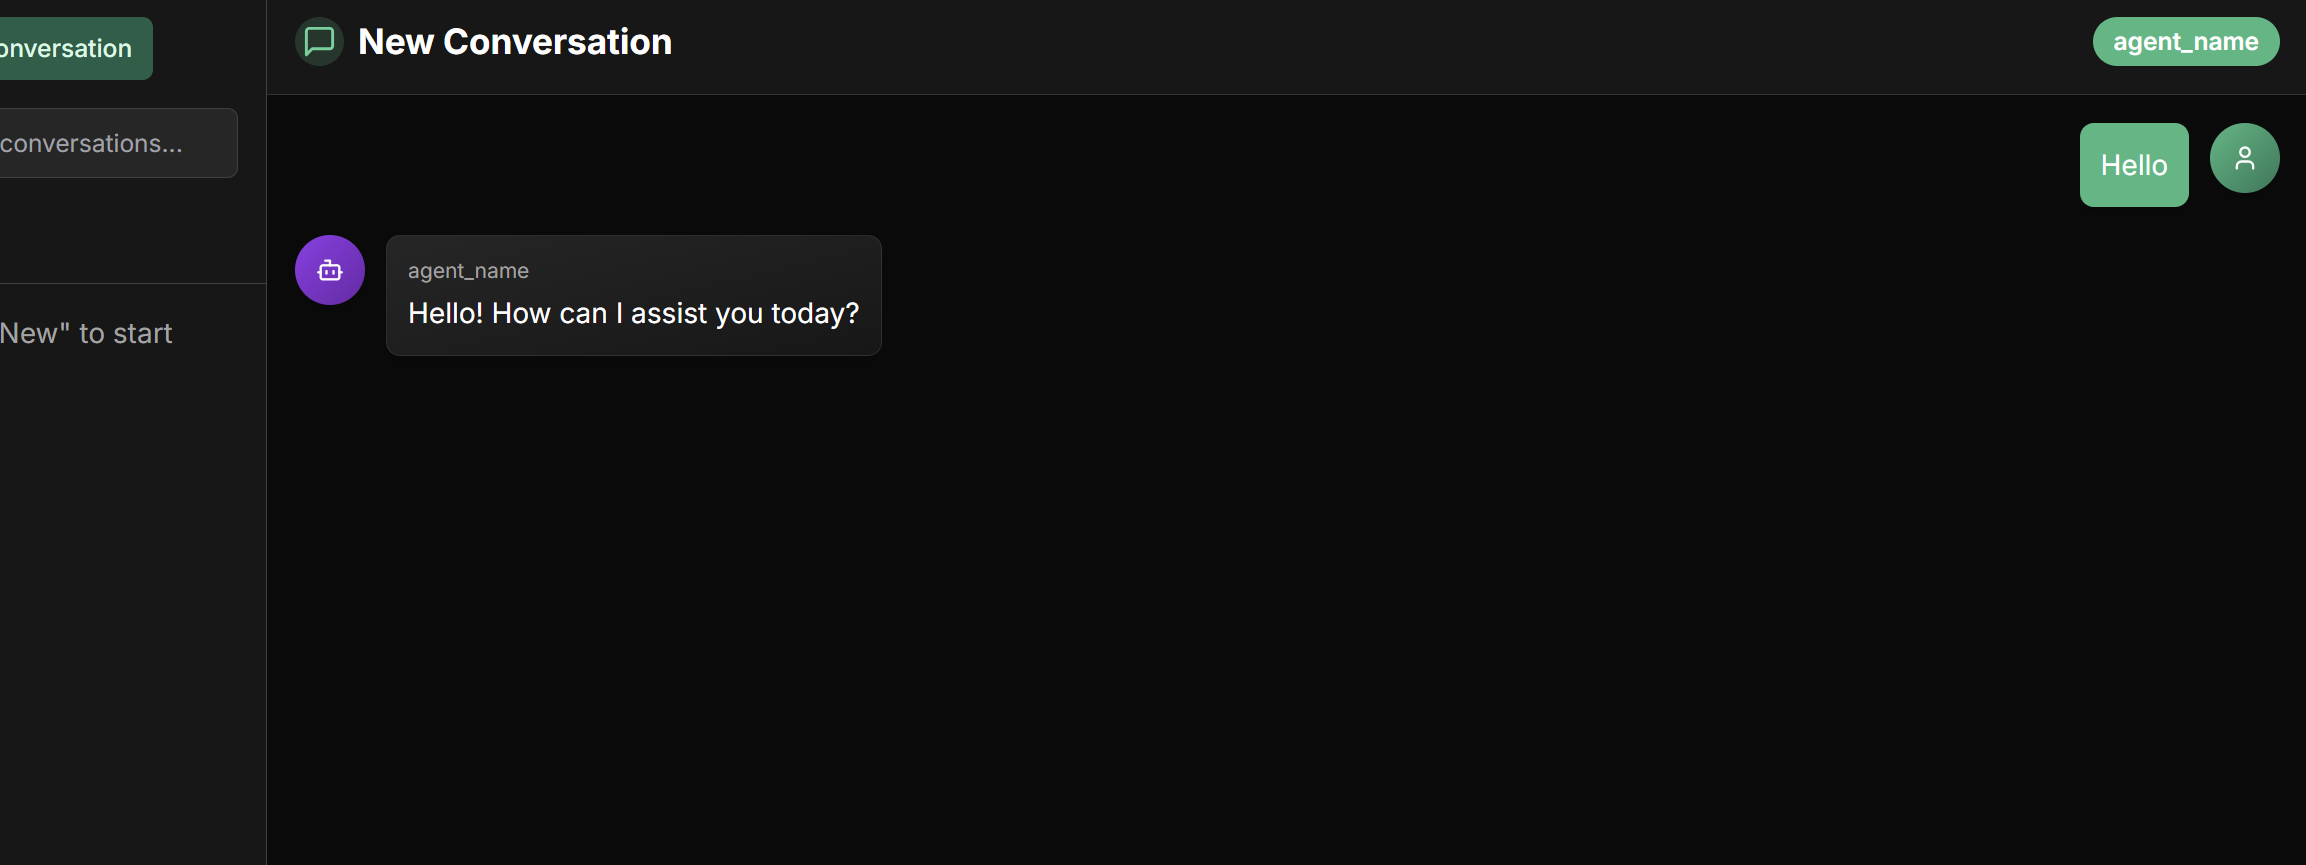
Testing Your Agent
First Conversation
Access chat interface
Access chat interface
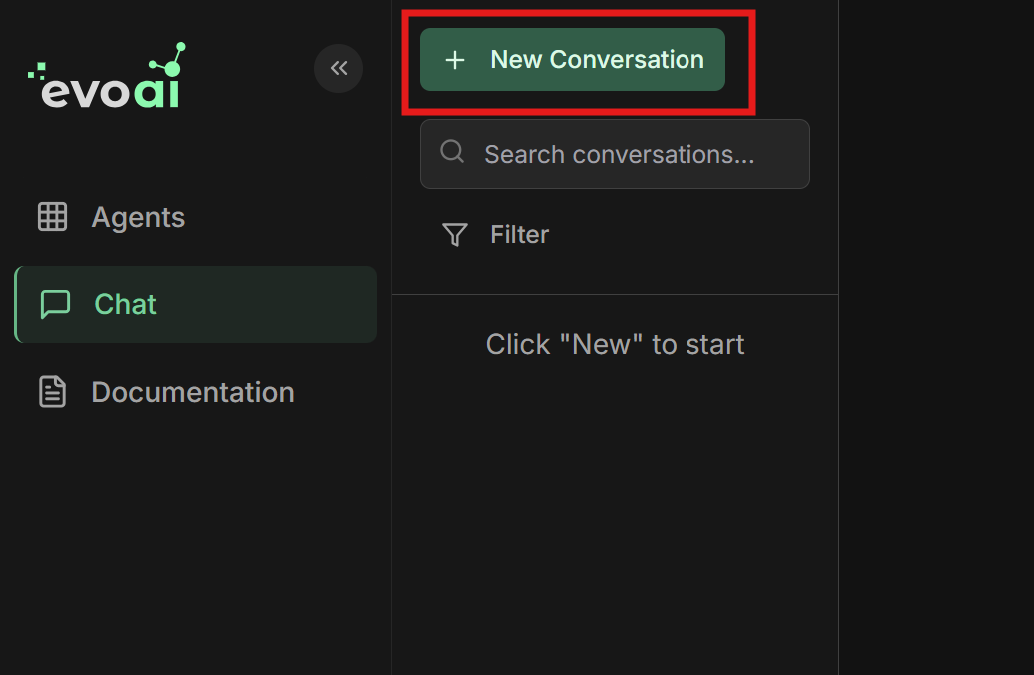
- Go to the chat screen in the main menu
- Click “New Chat” to start a new conversation
Select the agent
Select the agent
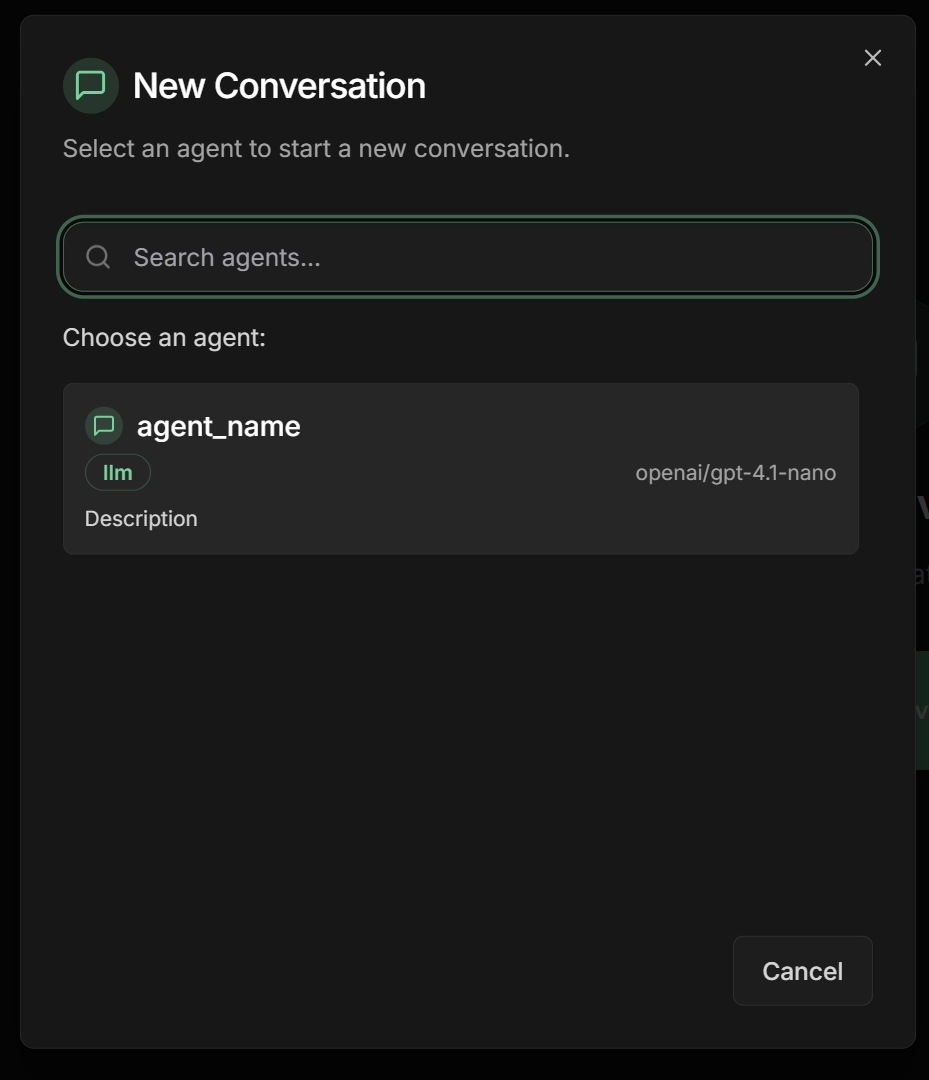
- Select the agent you just created
- The chat interface will load with the chosen agent
Test diverse scenarios
Test diverse scenarios
Evaluate performance
Evaluate performance
- Adjust instructions in the interface
- Add specific examples
- Refine tone of voice
- Test again
Essential Components in the Interface
1. Identity and Purpose
Name (Required)
Name (Required)
Name field in the interface:- Unique identifier of the agent
- Used for internal references and communication between agents
- Should be descriptive and reflect the agent’s function
- Avoid reserved names like
user
sales_assistanttech_supportfinancial_analyst
Description (Recommended)
Description (Recommended)
Description field in the interface:- Concise summary of agent capabilities
- Used by other agents to determine task routing
- Should be specific enough to differentiate it from other agents
- “Specialist in current invoice and billing inquiries”
- “Analyzes financial data and generates performance reports”
- “Resolves technical connectivity and configuration problems”
Model (Required)
Model (Required)
Model field in the interface:- Specifies the LLM that will power the agent’s reasoning
- Impacts capabilities, cost, and performance
- Select from list of available models
gpt-4- Advanced reasoningclaude-3-sonnet- Balanced and safegemini-2.0-flash- Fast and multimodal
2. Instructions
Essential elements
Essential elements
Instructions field in the interface:- Main task or objective
- Personality or persona
- Behavioral constraints
- Desired output format
- Step-by-step process
Tips for effective instructions
Tips for effective instructions
- Be clear and specific: Avoid ambiguities
- Use Markdown: Improve readability with headers, lists
- Provide examples: For complex tasks
- Define tone of voice: Professional, friendly, technical
Dynamic variables and state sharing
Dynamic variables and state sharing
{{var}} to insert dynamic values in agent instructions:Available automatic variables:{{user_input}}- The complete user message that initiated the conversation{{output_key_name}}- Result saved by other agents (where output_key_name is the configured key name)
- When an agent has an Output Key configured, its response is automatically saved in shared state
- Other agents can use this information in their instructions through placeholders
- State persists throughout the entire conversation or workflow
- Allows agents to work together, each contributing with their specialty
- Especially useful in sequential workflows, loops, and multi-agent systems
{{customer_analysis}}, now make a personalized recommendation.”3. Advanced Configurations
Agent Settings
Agent Settings
Agent Settings section in the interface:Load Memory:- When enabled, the agent will load and use its long-term memory
- Maintains context and information learned in previous sessions
- Allows continuity and personalization over time
- Useful for agents that need to “remember” user preferences
- Automatically loads conversation history when starting new session
- Provides immediate access to previous interactions and knowledge
- ⚠️ Consumption warning: Significantly increases token usage
- Monitor API costs when using this feature
- Recommended only for sessions that really need complete context
- Activates advanced planning capabilities for complex tasks
- The agent automatically divides large tasks into smaller steps
- Improves organization and execution of multi-step processes
- Ideal for agents handling complex workflows
- Enables access to organization’s knowledge base
- Automatically adds a knowledge search tool
- Tag Filter: Selects specific documents by tags
- If no tags are specified, uses all available documents
- Improves response quality with organizational information
- Defines specific structure for agent responses
- Ensures consistent and standardized output format
- Configures fields with name, type, and description
- Available types: string, number, boolean, array, object
- Useful for integrations and automatic response processing
Generation Parameters
Generation Parameters
Advanced Settings section in the interface:Temperature (0.0 - 1.0):0.0: Deterministic responses0.7: Balanced (recommended)1.0: Maximum creativity
- Token limit in response
- Controls response size
- Consider cost vs. completeness
0.1: Focused responses0.9: More diversity
Output Key - State Sharing
Output Key - State Sharing
Output Key field in the interface:The Output Key allows the LLM agent to save its response in a specific variable in shared state, making the result available for other agents or future iterations.How it works:- Configure the
Output Keyfield with a descriptive name - The agent’s response will be automatically saved in this variable
- Other agents can access using placeholders
{{output_key_name}} - Works in workflows, loops, and multi-agent systems
- When an LLM agent is used within a Loop Agent, the system automatically adds the
exit_looptool - The agent can use this tool to signal when the loop should stop
- This is useful for iterative processes like content refinement or analysis until desired quality is achieved
- Use snake_case:
analysis_result,processed_data - Be descriptive:
quality_feedbackinstead offeedback - Avoid conflicts with existing state variables
- Document expected format in instructions
- In loops, clearly instruct when agent should use
exit_loop
Common Use Cases
Customer Service
- Model: GPT-3.5-turbo (fast)
- Temperature: 0.3 (consistent)
- Sub-agents: Specialists by area
- Tools: Knowledge base
- Agent Settings:
- Load Memory: ✅ (remember preferences)
- Load Knowledge: ✅ (FAQ and policies)
- Output Schema: ✅ (structured tickets)
Sales Assistant
- Model: GPT-4 (advanced reasoning)
- Temperature: 0.7 (creative)
- Sub-agents: Qualifier, demonstrator
- Tools: Product catalog
- Agent Settings:
- Load Memory: ✅ (customer history)
- Planner: ✅ (sales process)
- Output Schema: ✅ (structured data)
Data Analysis
- Model: Claude-3-Sonnet (analytical)
- Temperature: 0.2 (precise)
- Sub-agents: Data collectors
- Tools: Data APIs
- Agent Settings:
- Planner: ✅ (complex analyses)
- Output Schema: ✅ (standardized reports)
- Load Knowledge: ✅ (methodologies)
Personal Assistant
- Model: Gemini-Pro (multimodal)
- Temperature: 0.5 (balanced)
- Sub-agents: Calendar, tasks
- Tools: Calendar, email
- Agent Settings:
- Load Memory: ✅ (personal preferences)
- Preload Memory: ✅ (complete context)
- Planner: ✅ (task organization)
Best Practices
Clear objective definition
Clear objective definition
- Be specific in the Description field
- Define clear limits in Instructions
- Establish measurable criteria in Goal
- Document use cases in Notes field
Conversation optimization
Conversation optimization
- Use Output Keys to track progress
- Configure Sub-Agents for specialization
- Implement fallbacks in instructions
- Monitor performance via logs
Agent Settings - Best Practices
Agent Settings - Best Practices
- ✅ Use for personalized service agents
- ✅ Enable for assistants that need to remember preferences
- ❌ Avoid for agents processing sensitive data
- ❌ Don’t use if privacy is critical
- ✅ Ideal for continuing complex sessions
- ⚠️ Caution: Monitor costs - significantly increases token usage
- ✅ Use only when historical context is essential
- ❌ Avoid for high-frequency/low-context agents
- ✅ Essential for complex multi-step tasks
- ✅ Use in analysis and reporting agents
- ✅ Ideal for structured sales workflows
- ❌ Unnecessary for simple/direct responses
- ✅ Configure specific tags to filter relevant knowledge
- ✅ Use for agents needing organizational information
- ✅ Combine with clear instructions about when to search knowledge
- ❌ Without tags can slow responses in large bases
- ✅ Essential for integrations with other systems
- ✅ Use to standardize structured data
- ✅ Define clear descriptions for each field
- ✅ Test schema before using in production
- ❌ Don’t use for simple natural conversations
Security and reliability
Security and reliability
- Validate inputs in instructions
- Limit scope of each agent
- Configure rate limiting if available
- Monitor costs via dashboard
- ⚠️ Special attention: Preload Memory significantly increases costs
- Manage access to knowledge base via appropriate tags
Next Steps
Workflow Agents
Advanced Configurations
A2A Protocol
Custom Tools
LLM agents are the foundation for creating truly intelligent and adaptable AI experiences. With proper configuration via the platform interface, you can build powerful assistants that meet your business’s specific needs.