Overview
This guide will help you set up Evo AI and create your first functional agent in just a few minutes. You will learn to:- Register on the online platform
- Confirm your account via email
- Configure API Keys from AI providers
- Create your first LLM agent
- Test the chat with your agent
Online Platform: This guide uses the online version of Evo AI at app.evo-ai.co.
For local installation, check our installation guide.
Step 1: Platform Registration
Creating Your Account
Access registration page
Access registration page
- Go to app.evo-ai.co/login
- Click on the “Register” tab at the top of the screen
- You will see the Evolution API registration form
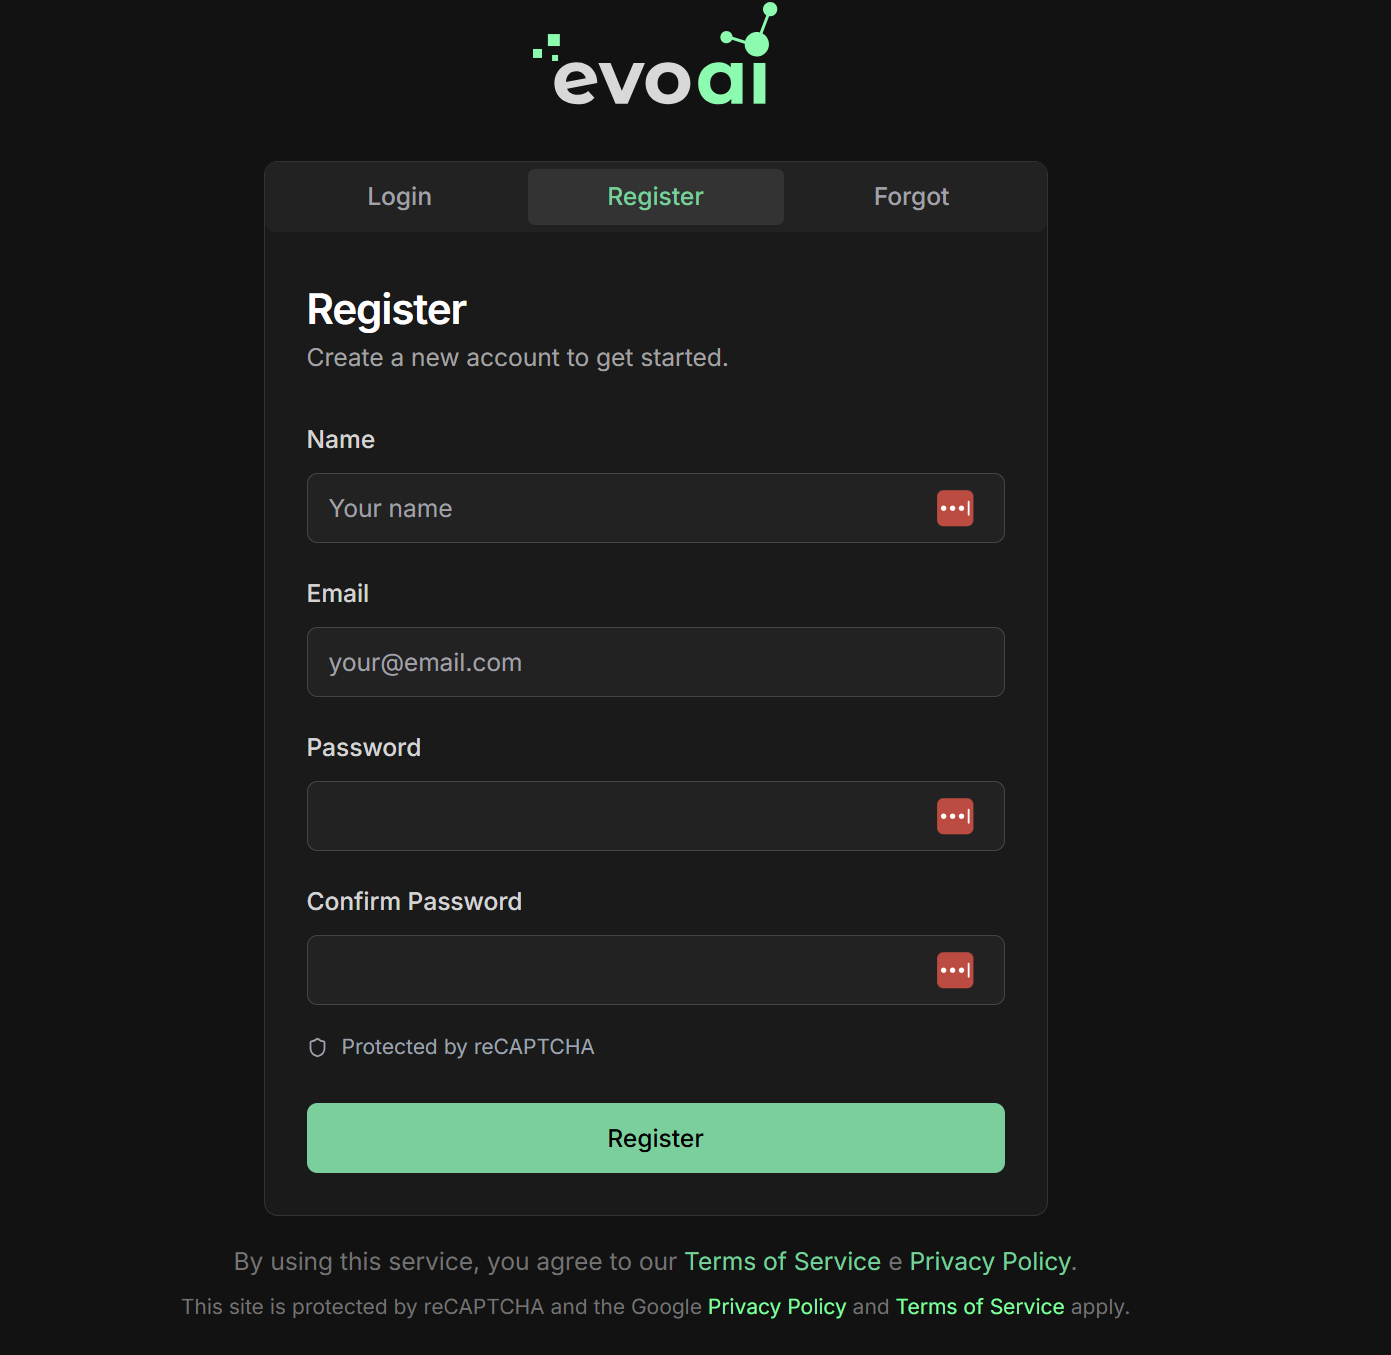
Fill registration data
Fill registration data
Fill in all mandatory fields:
- Name: Your full name
- Email: Valid email (will be used for verification)
- Password: Secure password (minimum 8 characters)
- Confirm Password: Confirm your password
reCAPTCHA protection
reCAPTCHA protection
- The platform has reCAPTCHA protection for security
- Complete the reCAPTCHA verification when requested
- By using the service, you agree to the Terms of Service and Privacy Policy
- The site is protected by Google reCAPTCHA
Step 2: Email Confirmation
Account Verification
Check confirmation email
Check confirmation email
- After registration, check your inbox
- Look for a confirmation email from Evolution API
- Click on the verification link in the email
- Your account will be activated automatically
Didn't receive the email?
Didn't receive the email?
If you don’t receive the confirmation email:
- Go back to app.evo-ai.co/login
- Click on the “Login” tab
- Try to log in with your email and password
- If the account is not verified, click on “Resend Verification”
- A new email will be sent
Step 3: First Login
Accessing the Platform
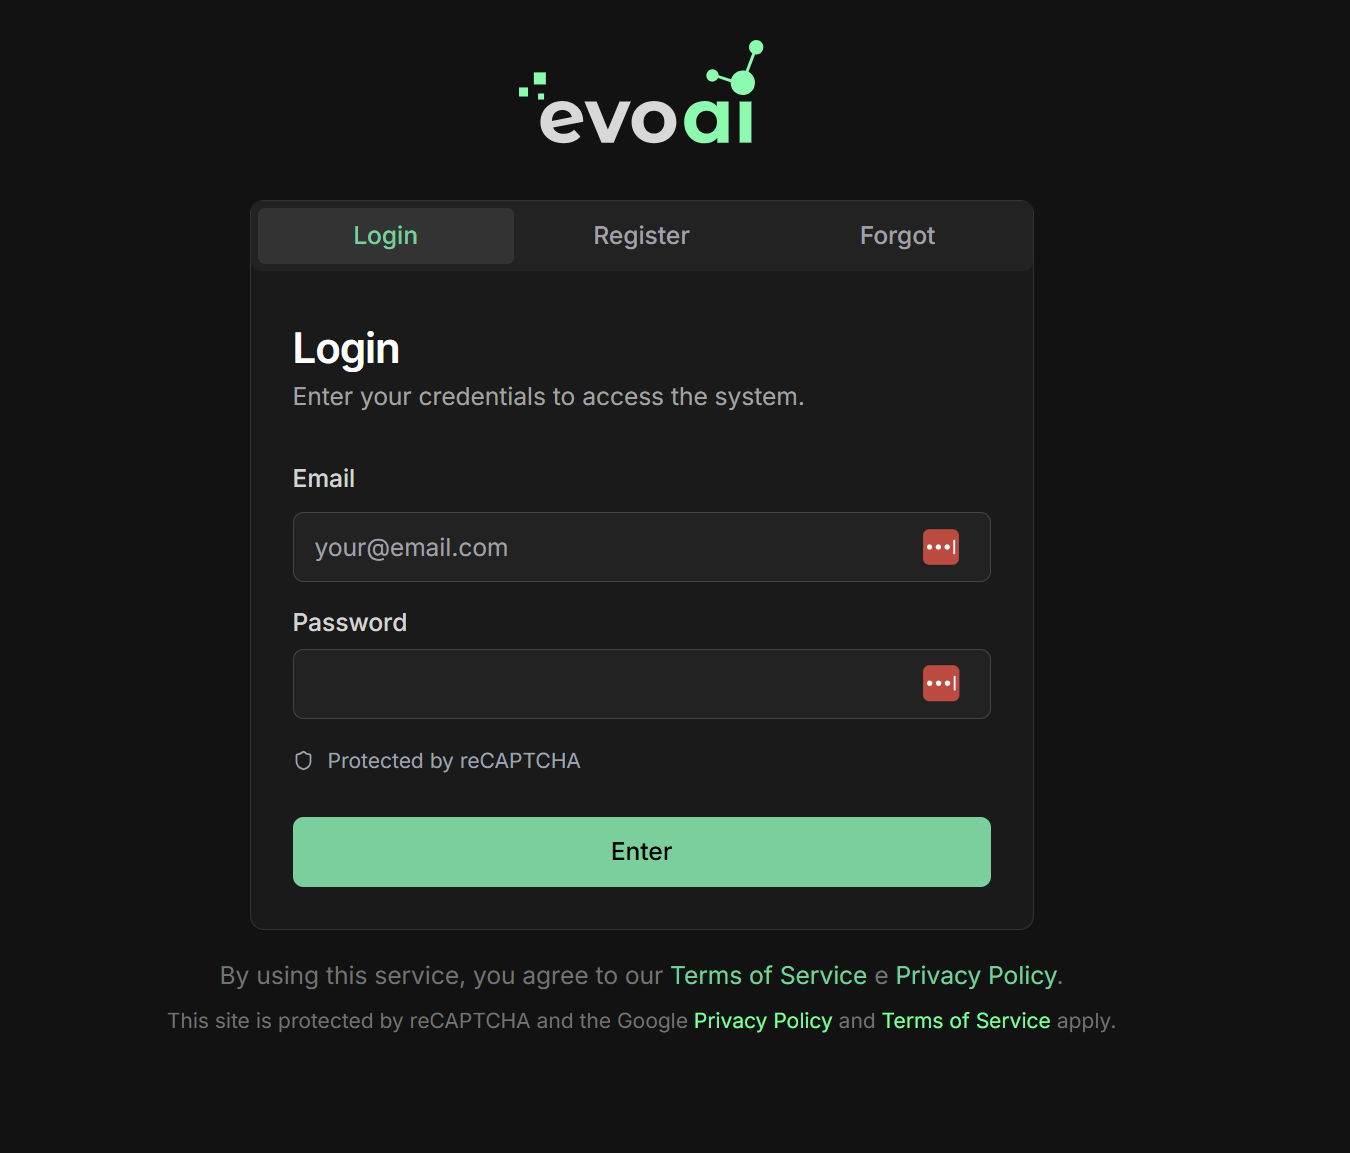
Log in
Log in
- Go to app.evo-ai.co/login
- Click on the “Login” tab
- Enter your email and password
- Complete the reCAPTCHA verification if requested
- Click “Enter”
- You will be redirected to the main dashboard
Step 4: Configuring API Keys
Adding AI Providers
Access API Keys configuration
Access API Keys configuration
- After logging in, you will be on the agents screen
- Click on “API Keys” in the side menu
- You will see the list of available providers

View available providers
View available providers
In the API Keys screen you will see all supported providers:
Register your first API Key
Register your first API Key
Available providers: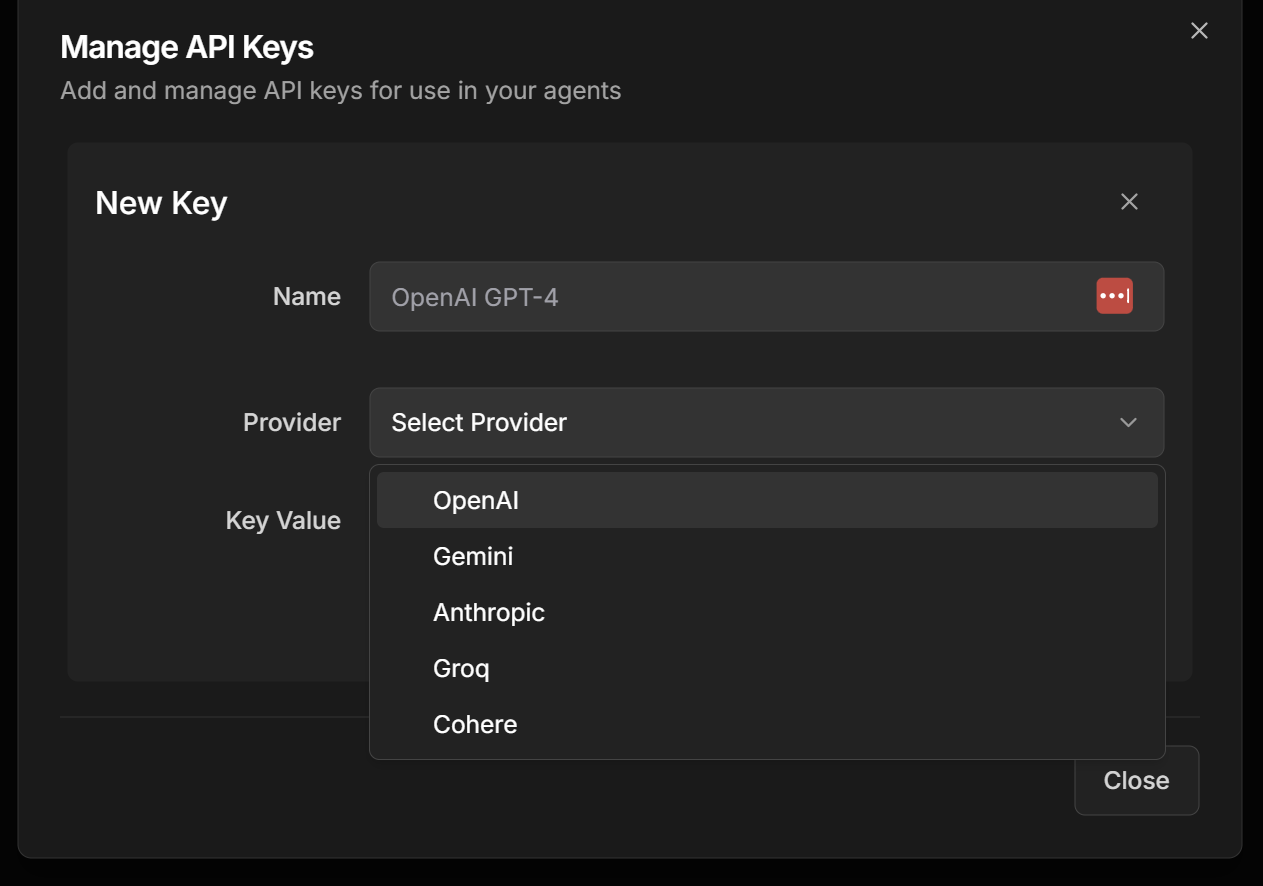
- OpenAI (GPT-4, GPT-3.5-turbo)
- Gemini (Google AI)
- Anthropic (Claude)
- Groq (Llama, Mixtral)
- Cohere (Command, Embed)
- Select the desired provider
- Paste your API Key in the corresponding field
- Click “Save” or “Add”
Security: All API Keys are saved end-to-end encrypted for maximum security.
How to get API Keys
How to get API Keys
OpenAI:
- Go to platform.openai.com
- Go to “API Keys” and create a new key
- Go to ai.google.dev
- Get your free API key
- Go to console.anthropic.com
- Create an account and generate your API key
- Go to console.groq.com
- Register and get free access
- Go to dashboard.cohere.ai
- Create an account and generate your key
Step 5: Creating Your First Agent
LLM Agent Configuration
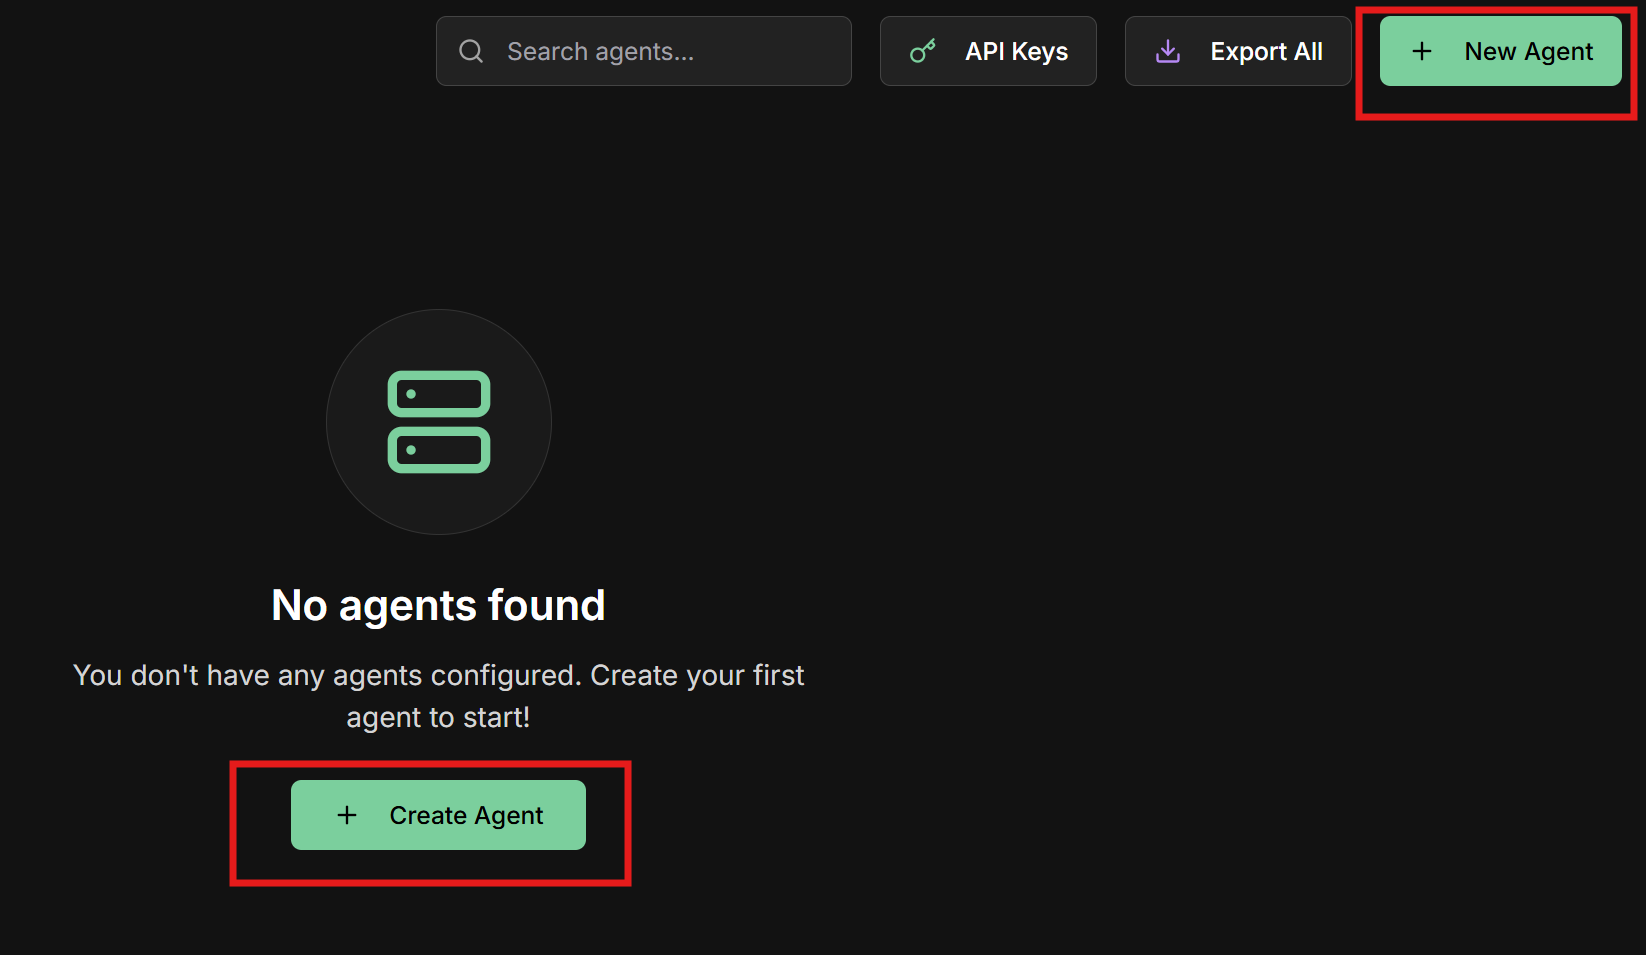
Start agent creation
Start agent creation
- On the main screen, click “New Agent”
- You will be directed to the creation form
Fill agent form
Fill agent form
Fill in all form fields:Type: Select “LLM Agent”Name: Name of your agentDescription: Clear description of the purposeRole: Role that the agent will playGoal: Main objective of the agentAPI Key: Select one of the already registered API KeysModel: Choose the AI modelInstructions: Detailed instructions for the agent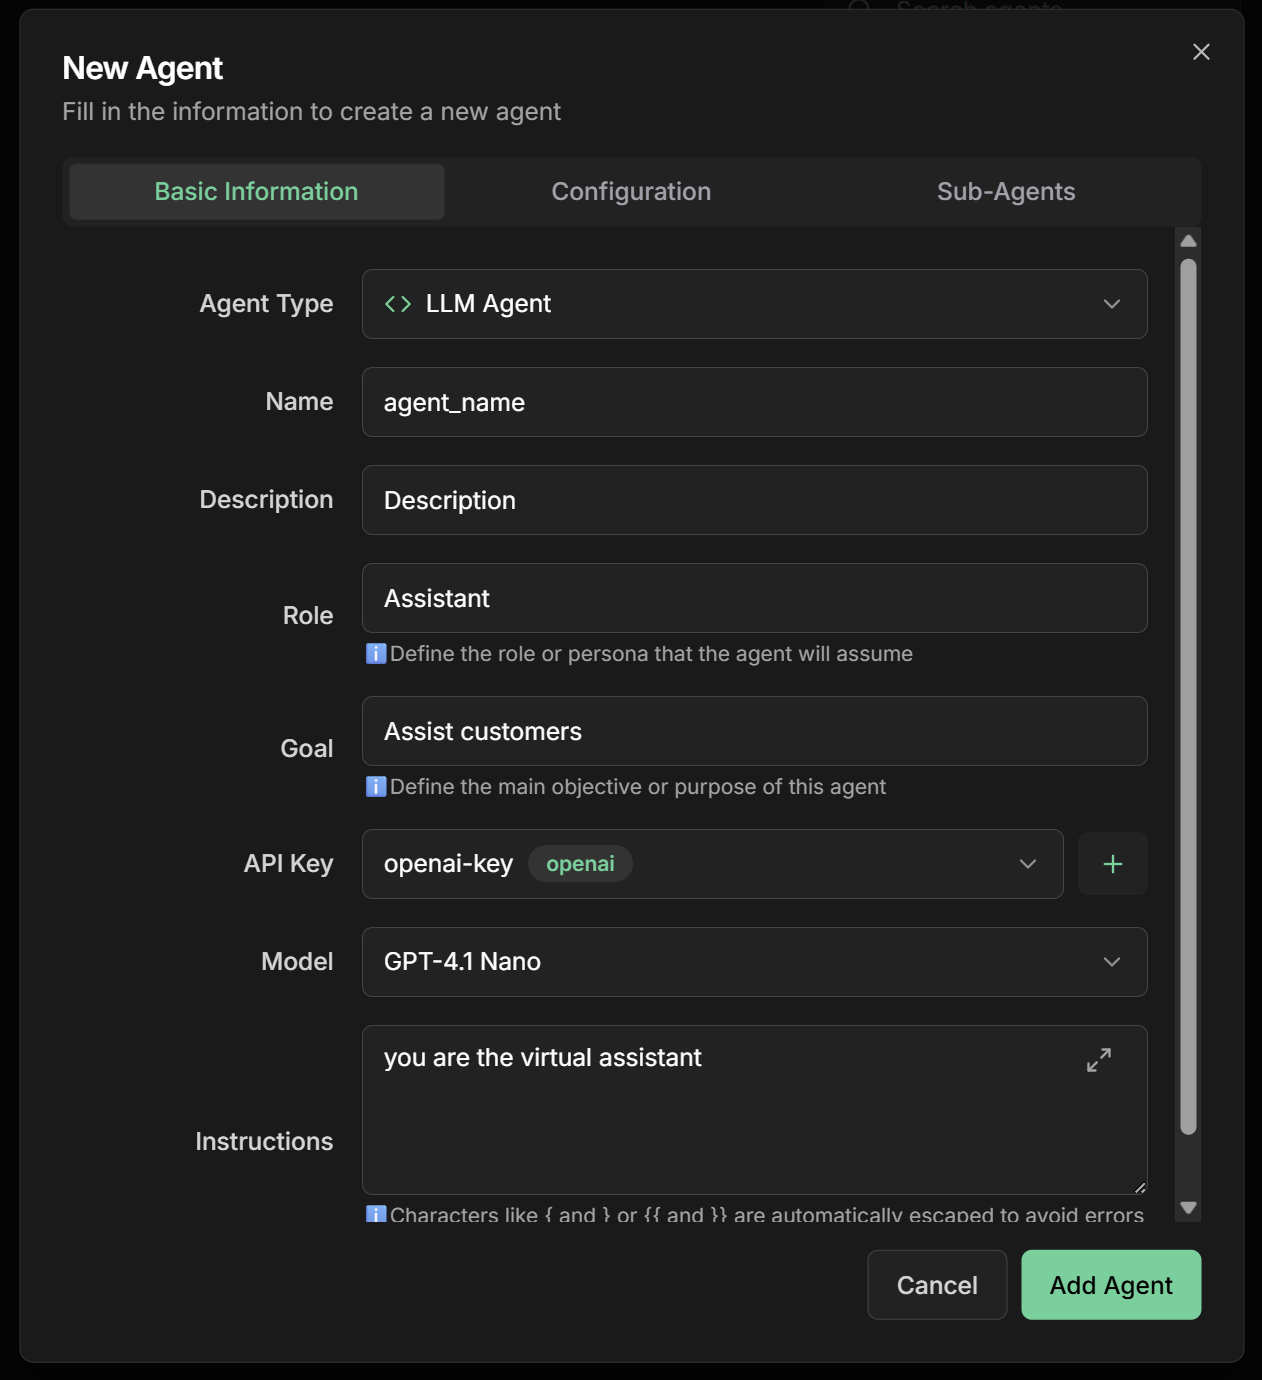
Save the agent
Save the agent
- Review all configurations
- Click “Save” or “Create Agent”
- Wait for creation confirmation
- Your agent will be available in the agents list
Step 6: Testing the Chat
First Conversation with Your Agent
Access the chat
Access the chat
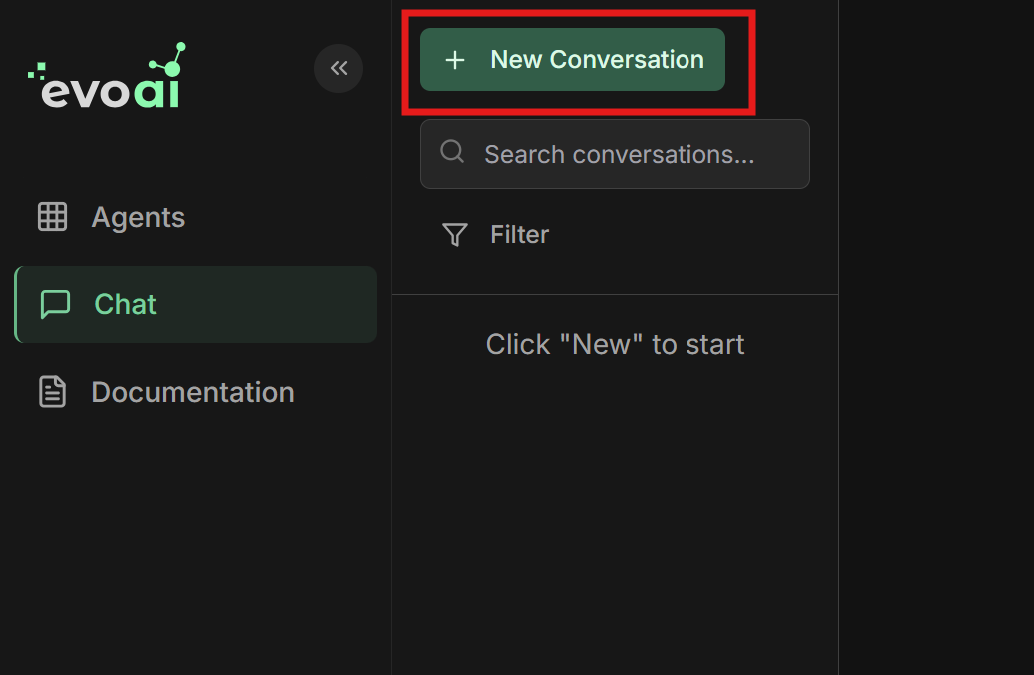
- Go to the chat screen in the main menu
- Click “New Chat” to start a new conversation
Select the agent
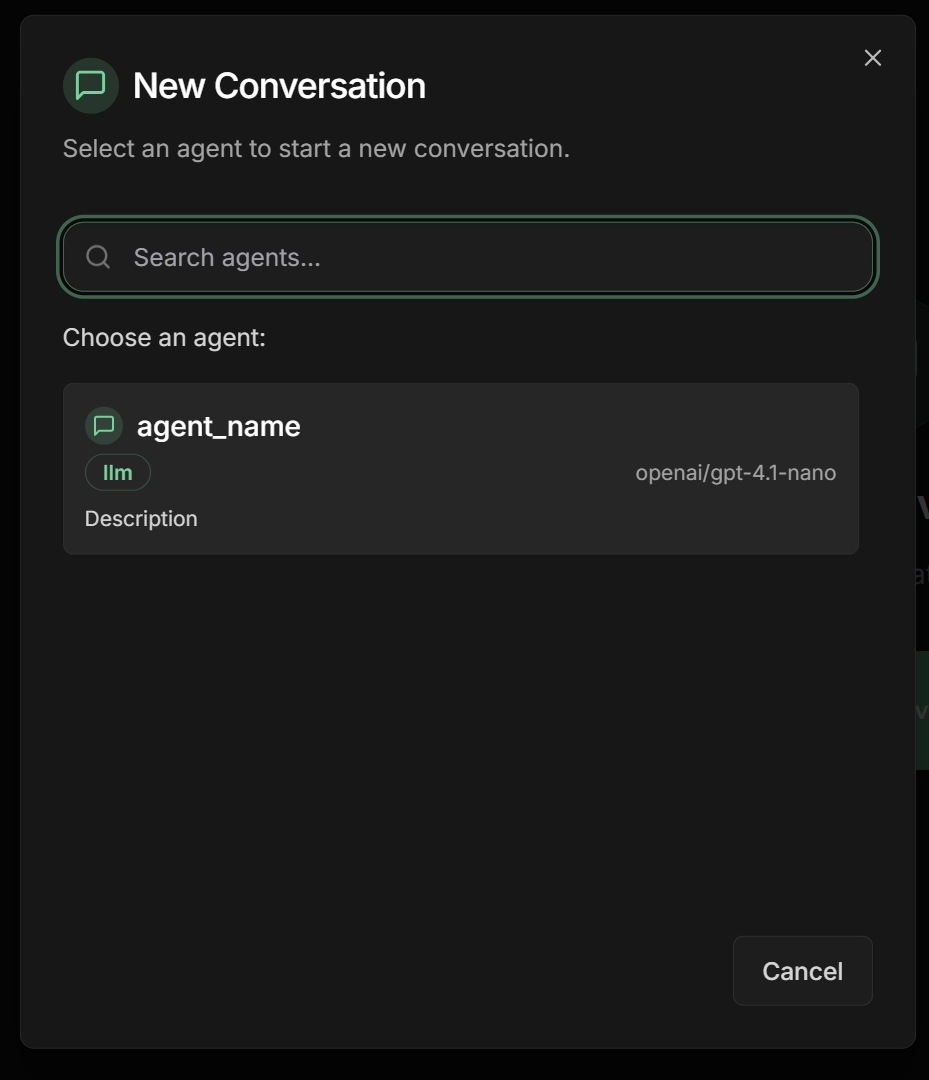
Select the agent
- Select the agent you just created
- The chat interface will load with the chosen agent
Start conversation
Start conversation
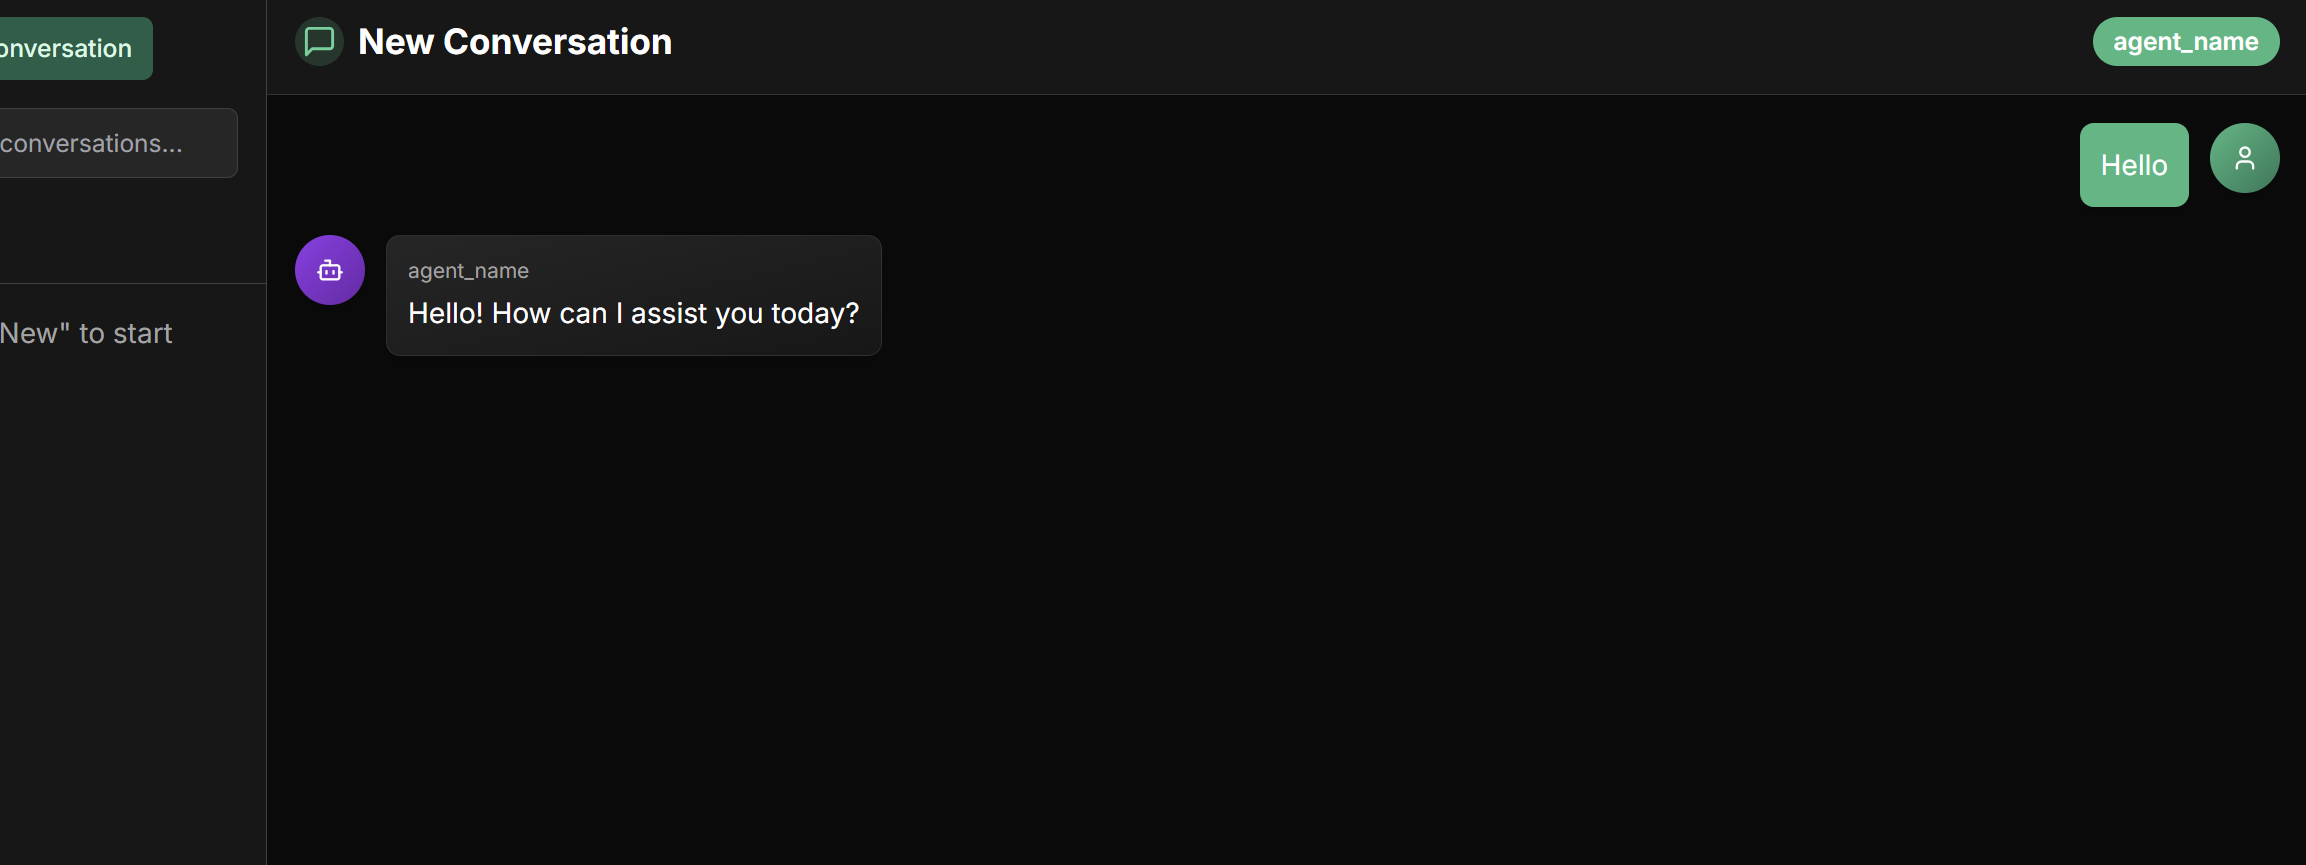
- Type a test message in the text box
- Press Enter or click the send button
- Wait for the agent’s response
- Continue the conversation naturally
Chat freely!
Chat freely!
Now you can:
- Ask questions about any topic related to the agent’s role
- Test different scenarios to validate responses
- Evaluate the quality of interactions
- Adjust settings if necessary
Next Steps
A2A Protocol
Integrate agents using the Agent 2 Agent protocol for external communication
Share Agents
Configure shared agents for team collaboration
Agent Types
Explore different agent types: LLM, Sequential, Parallel, Loop, Workflow and Task
Advanced Settings
Configure credentials, custom tools and MCP servers
Troubleshooting
Common issues
Common issues
I don’t receive confirmation email:
- Check spam/junk folder
- Use “Resend Verification” on the login screen
- Wait a few minutes before trying again
- Check if the API Key is correct
- Confirm there are available credits in the provider account
- Test the API Key directly on the provider’s website
- Check if the API Key is working
- Confirm the selected model is available
- Check if there are sufficient quotas/credits
- Clear browser cache and cookies
- Try using another browser
- Check your internet connection
🎉 Congratulations! You have successfully created your first agent in Evo AI and can now start chatting with it. Explore the advanced features to create even more powerful experiences!